Showing posts with label baking. Show all posts

Thursday, March 21, 2013

Chocolate Chip Salted Caramel Cookie Bars


I tend to judge a recipe by it's name. The more adjectives in a sweet treat, the better in my opinion. I was hoping to put this up sooner, but my laziness kicked in. But at least I was consistent these last two posts. This one and the last one were both posted on the 21st of the month. Maybe that should be my goal for now. I wanted to post weekly, but that's not working so well. Although a month from now all my time will be spent packing because we are moving into a house! We are pretty excited. But for now, back to my sweet treat full of adjectives.

Think of a thick chocolate chip cookie stuffed with salted caramel...now make this recipe from Two Peas and Their Pod because that is essentially what you get. These rich bars keep well and are perfect for potluck desserts, parties, or just taking the pan to the couch and digging in.

Yield: 9x13 pan, cut however you'd like
Time: 45ish minutes

Ingredients
12 Tbs melted butter, cooled
1 cup light brown sugar
1/2 cup sugar
1 egg
1 egg yolk
2 tsp vanilla 
2 1/8 cup flour
1/2 tsp salt
1/2 tsp baking soda
 2 cups chocolate chips
10 oz caramel candies, unwrapped (it's not quite a whole  bag)
3 Tbsp heavy cream
Sea Salt

Preheat oven to 325 and prepare a 9x13 glass pan with a bit of cooking spray or butter.

In a large bowl use a mixer or beater to combine cooled melted butter, brown sugar, and sugar. Add in the egg, egg yolk, and vanilla.
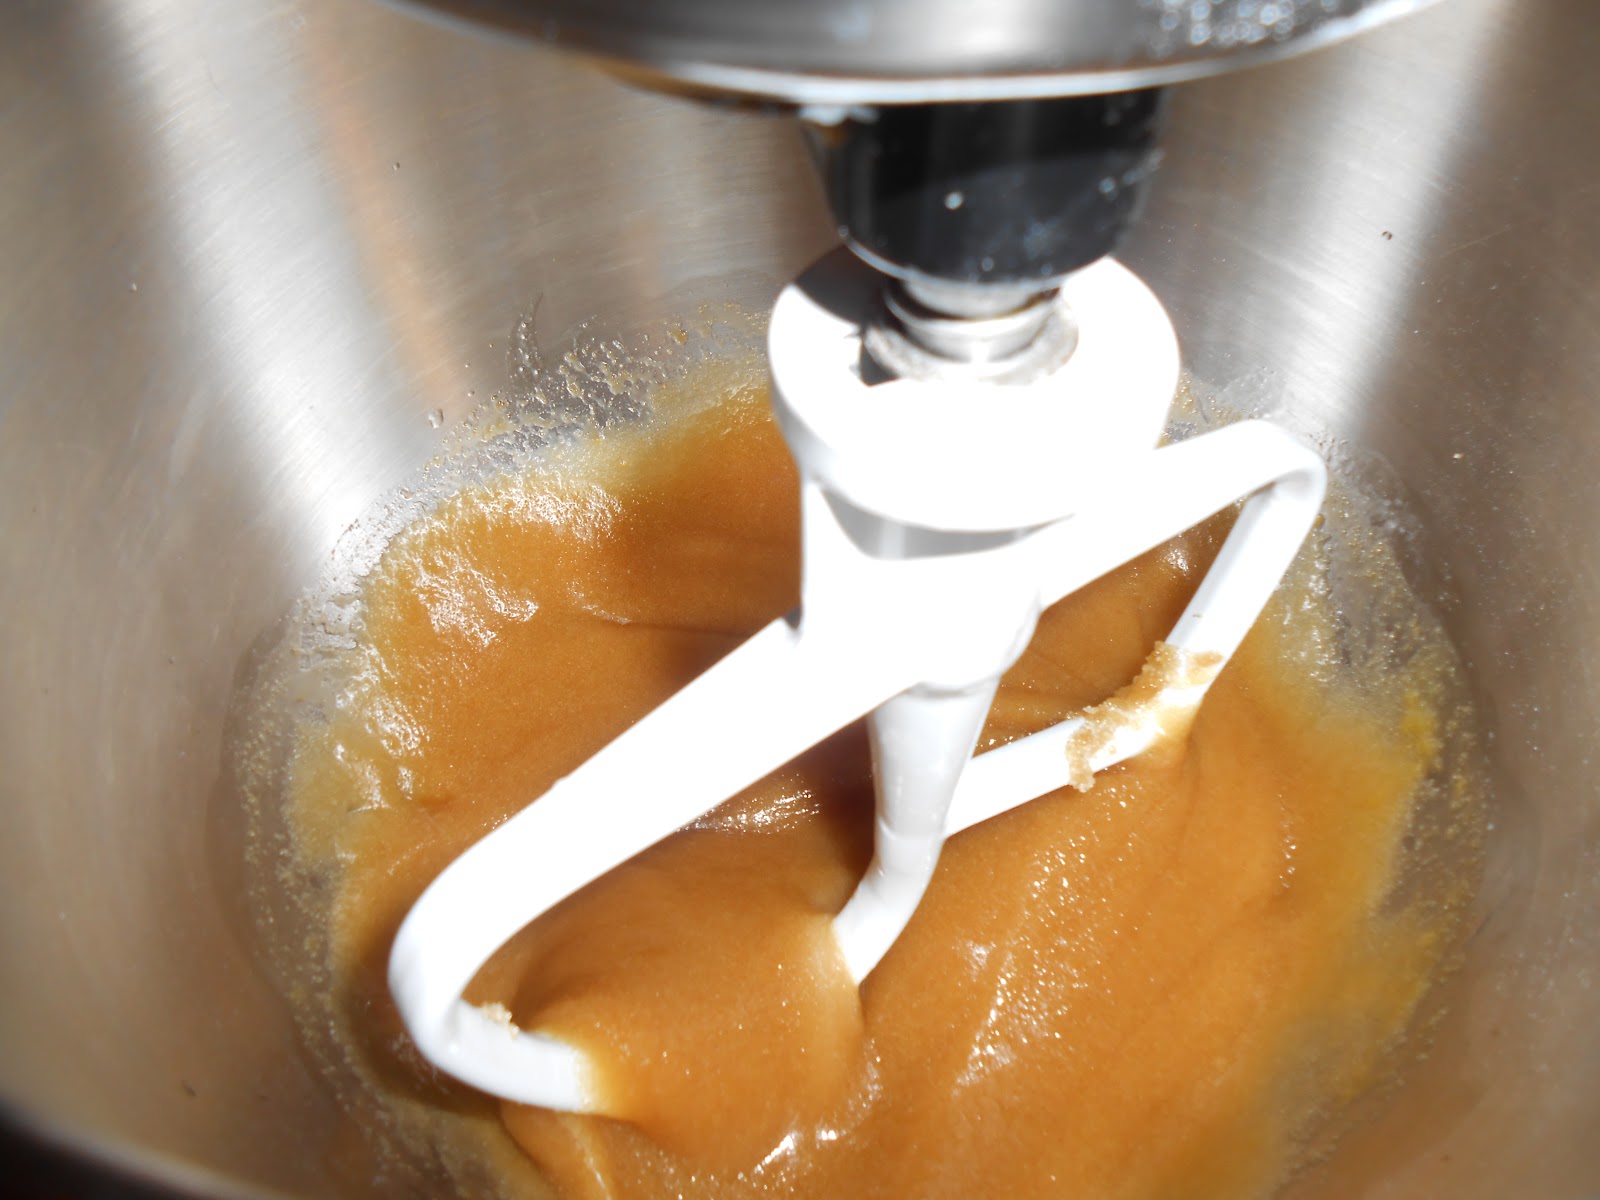


Slowly add in the flour, salt, and soda. People always say to mix the dry ingredients and then add them in to the wet, but I almost never do that. I add in 1 cup of flour to the wet and mix it up. Then I measure out the 1/8 cup flour with the salt and baking soda and add that in. Finish up with the last cup of flour.


When the dry ingredients are mixed in, time to stir in the best part, the chocolate chips!


Once the batter is ready, press about half the dough into your prepared pan; cover the whole bottom.

Now get those caramels and add in the heavy cream. Microwave that gooeyness until they are melted. It normally takes about 2 minutes on high, stopping to stir every 20-30 seconds. As soon as the caramels are all melted and the cream is absorbed, it's ready.


Pour the melted caramel all over the dough pressed in the pan. Use all that gooey goodness to cover the dough.

 
Once that's done, sprinkle as much sea salt as you want on top of the caramel. I tend to put more than I think is necessary, because there is a lot of flavor in these bars and I want the salt to be tasted and not hidden.


Once it's covered with your desired amount of salt, press the rest of the cookie dough on top of the caramel. I like to take chunks of the dough and flatten it with my fingers before placing it on top of the caramel. You won't completely cover the caramel, just cover what you can.


Finally, sprinkle some more salt on top and stick that pan in the oven!

Let the bars bake for about 30 minutes or until the top of the bars are golden and the edges pull away from the pan. Sadly, you have to let these bars cool to room temperature on a cooling rack before you can cut them, otherwise they become a ridiculous mess.

 
Cut at your own risk.


Watch how fast these bars disappear and enjoy!


Original post at http://www.twopeasandtheirpod.com/chocolate-chip-salted-caramel-cookie-bars/

Saturday, July 14, 2012

Chocolate Zucchini Bread

 I love Farmer's Markets. I love people watching and seeing what is available to buy. Some days I come home with nothing but other days I come home loaded with tomatoes, potatoes, berries, peppers, herbs, and zucchini. I get home and wonder what I'm going to do with it all, but I figure that out later. I do have a couple quick fixes for zucchini. This recipe is one of them.

Growing up my mom often made zucchini brownies. That sounds odd, but they are really just chocolate brownies with tiny flecks of green. You don't really taste the zucchini..just chocolate. They are pretty good. So last year when I was looking for alternative baked goods involving zucchini, I cam across this recipe from Adam and Joanne at Inspired Taste. This bread is delicious! You don't taste the zucchini one bit and the texture is barely tampered with. It's moist, chocolatey, and sweet enough for dessert, but not too sweet for breakfast. It has a delightful cake texture and is just all around amazing. If you have extra zucchini lying around, grate it up and get ready for something amazing.

Time: 70 minutes
Makes 1 loaf or 18 muffins
Ingredients
1/2 cup vegetable oil
1/2 cup sugar
1/2 cup brown sugar
2 large eggs
1 tsp vanilla
1 Tbsp instant coffee granules
1 cup flour
1/2 cup unsweetened cocoa powder
1 tsp baking soda
1/4 tsp baking powder
1/4 tsp salt
1 1/2 cup grated zucchini
3/4 cup chocolate chips, opt

Preheat the oven to 350. Lightly spray a 9x5 loaf pan and set aside.

In a large bowl, cream the oil and both sugars. Beat in the eggs, vanilla, and coffee granules.
Pre-beating...
Post-beating
 In a medium bowl, combine all the dry ingredients (flour, cocoa powder, baking soda, baking powder, and salt).
I thought it was kind of pretty...so I snapped a picture.
Mix it up well
 Dump your shredded zucchini into the bowl with the dry ingredients. I had a 1/2 cup measure handy so I loaded it up and dumped it in.


Mix it up until all the zucchini is coated with the powders.


 Add the dry ingredients and zucchini into the wet ingredients in batches. Mix it until everything is moistened and combined. If you want to add chocolate chips, do that now.


Pour the batter into your pan and pop it in the oven. I didn't have a 9x5 pan so I used my slightly smaller pan and one mini-loaf pan.

Please ignore the cast iron pizza pan...it's been treated pretty roughly.
 Bake the cake...I mean bread...for about an hour. You should be able to stick a toothpick in it and have it come out clean. Set the loaf on a cooling rack and dump it out whenever you feel up to it. If you make muffins instead of a loaf, they only take about 20 minutes.


I forgot to take a picture of it sliced because I just wanted to eat it. So yummy! Next time I'm going to make it in muffin wrappers just for something different. If you do that though, remember it won't bake as long. Slice a chunk off and enjoy with a cold glass of milk!

Original recipe at http://www.inspiredtaste.net/2108/chocolate-zucchini-bread/

Thursday, July 5, 2012

Oatmeal Coconut Chewies


As a kindergarten teacher, I acquire some odd things. I've collected small nick-knacks given to me by little hands, items left in cubbies, and various artifacts from the playground. Also, random food items; as part of the Christmas party, kindergarteners make candy trees instead of gingerbread houses. As the teacher, I request parents to send various candy items to school: white frosting, M&Ms, licorice, marshmallows, chocolate chips, coconut, etc. Kids get to frost pointy ice cream cones with green frosting and stick candy all over it. Of course, by the end students have mouths dyed by green frosting and they are hyped up from all the candy that didn't make it on the tree.

I had some extra coconut that I had no use for at school, so i brought it home to use. I didn't feel too bad doing this, because the kids really weren't that into coconut and it would be better used in my cabinets. So I come home and shove 3 bags of coconut in my cabinet, not having a clue what I should do with them. I scour the internet for different recipes and definitely found a few winners. Among them were these Oatmeal Coconut Chewies from Mel at Mel's Kitchen Cafe. These are tasty with an awesome chewy texture if you bake them just right. They come together quickly and are fantastic if you have coconut to use, like me!

Time: 10 min prep and 10 min for each tray you bake
Ingredients
1 cup white sugar
1 cup brown sugar
2 eggs
1 cup softened butter
2 tsp vanilla
1 tsp baking powder
1 tsp baking soda
1/2 tsp salt
2 1/2 cups flour
1 cup shredded coconut
1 cup quick oats

Preheat oven to 350 F.

Cream together both sugars, eggs, butter, and vanilla until it looks like this...
 
Pretty color for baking... :)

Dump in the baking powder, soda, salt, and flour and mix until it's all combined.
Finally, dump in the oatmeal and coconut and stir to combine.
It will be pretty thick, but mix it as well as you can.
Grease your cookies sheets or slap your parchment paper on there and drop the dough by tablespoons a couple inches apart. They will spread quite a bit so be sure to leave some space.
Bake the cookies for about 10 minutes. They should be just barely browned. If they brown too much they will be crispy and not chewy. In my picture below, I actually overbaked them slightly. Watch them carefully!
Let them cool on the sheet for about 5 minutes and place them on a cooling rack. These cookies are amazing especially if you just want something sweet, but not too sweet. Good stuff!

Original recipe at http://www.melskitchencafe.com/2010/06/oatmeal-coconut-chewies.html

Saturday, June 30, 2012

German Chocolate Brownies - Waldman Family Style


It's been a month since my last post...you would think with school out that I would have posted much more. However, since school has ended I have had oral surgery, attended my grandfather's 80th birthday, started and finished a Master's course, and gotten a new puppy! It's been a busy month! But I had a bit of downtime and thought it was time to share another recipe.

For my grandfather's birthday, he requested these German Chocolate Brownies. He had a big party at his house with all his friends and the whole family. It was a wonderful time and it was an excuse for me to bake! I baked four different things and came home with very little. One item was the Slutty Brownies that I shared not too long ago. Those were a hit among the little old ladies and they though the name was a hoot! My grandfather's friends are pretty great. So anyway...back to these brownies. I don't really know where this recipe came from but my mom has been making it for years. If you love chocolate, caramel, and brownies, you will love these brownies!

Time: 45ish minutes
Ingredients
1 package of wrapped caramels (14 oz size)
2/3 cup evaporated milk, divided
1 package German Chocolate Cake Mix (any brand will work)
2/3 cup butter, melted
1 package chocolate chips (12 oz)

Preheat oven to 350.

The first thing you have to do is unwrap all those caramels. It takes a while and I know you will be tempted the whole time, but it must be done. As you unwrap the caramels throw them into a microwave-safe bowl or into the top part of a double boiler. Now melt those sticky pieces of awesomeness using whatever method you choose. Once they are melted, stir in 1/3 cup of evaporated milk.


Once that is all mixed well, set it aside.


In a medium-sized mixing bowl, combine the German Chocolate Cake mix with the melted butter and the remaining 1/3 cup evaporated milk. It will seem thick, but remember, the desired outcome is brownies, not cake. 

Now, press half of the batter into a greased 9x13 pan. You can use a spatula, spoon, or whatever, but as you can see from the picture, I may have used my hands...and left finger indentations...
Pop it in the oven for about 6 minutes or until it is slightly firm.
While this layer is still warm, sprinkle the chocolate chips over the whole pan.
Remember that caramel mixture you set aside? Get that and spread it on top of the chocolate chips. Run a spatula over all of it until the whole bottom layer is covered.

Now comes a tricky part. You have to take the rest of the batter and spread it on top of the caramel. It's tricky, because the batter doesn't spread very easily. I take chunks of it in my fingers and squish it before I place it on top. Try your best to cover as much of the caramel as possible.
 It looks awkward, but it will bake to deliciousness...I promise.
I thought it looked cool, so I took another picture...

Now stick the whole thing in the oven for about 20 minutes or until the brownie portion has set and has browned around the edges. 
Here comes another tricky part...you must let these cool completely before cutting in! If you don't, they will be a gooey mess. An amazing gooey mess, but not finger food. However, my family has been known to scoop the goo in a bowl and eat it with ice cream. But these are meant to be brownies. So, cool and then cut. Please make these...you won't regret it. They are chewy, chocolatey, and delicious!

Saturday, May 19, 2012

Slutty Brownies....Finally!

So looking at my blog, I can see that I have not posted since the beginning of April...it is now towards the end of May. That lack of activity can be attributed to a hectic schedule. But, school is over for the year! The end of the year is a time of ridiculous crazyness, but it is over! To catch up, I have ended my last year as a Kindergarten Dual-Language teacher and will be teaching K-6 Spanish in a different district. As for TBDH, he is still figuring out what he wants to do. Currently is is interning with a computer repair service and looking for jobs. We will see what happens.
As school was coming to an end, I decided I needed to take something special to the staff. These brownies seemed perfect. Oreos were on sale and I had an idea. I found these Slutty Brownies on Pintrest from several different sources, but they were all essentially the same. One source actually did give some reason for the name. She says that these are easy and just a little bit dirty. One source also called them Lasagna Brownies, but I'm a fan of the Slutty moniker. I tried making these brownies once and they turned out pretty good, but I knew they could be better. I tried a second time but they weren't as good as the first time. So I had an idea to help these reach their full potential. Essentially these brownies are cookie dough, Oreo, and brownie. The first and second time I made these I discovered the cookie dough bakes much faster than the brownie, creating a drier crust and with a very moist top. I was hoping for more moisture in the cookie layer too.
My brilliant idea was to make these in muffin tins instead of a large pan! Brilliant, right?! It's not that exciting until to taste them. So moist and delicious. You must try these!

Time: 40 minutes
Makes about 2.5 dozen brownies with extra cookie dough
Ingredients
Full recipe of your favorite chocolate chip cookie dough (I use the Nestle Tollhouse recipe for these, with slight alteration)
Brownie batter (I'm a fan of Betty Crocker's Fudge Brownie Mix)
1 package of Oreos

Nestle Tollhouse Chocolate Chip Cookies Recipe
1 stick of soften butter
1/3 cup oil
3/4 cup sugar
3/4 cup brown sugar
1 tsp vanilla extract
2 eggs
2 1/4 cups flour
1 tsp salt
1 tsp baking soda
2 cup chocolate chips

Betty Crocker Fudge Brownies
1 brownie mix
1/4 cup water
2/3 cup vegetable oil
2 eggs

Preheat oven to 375

For the cookies
Cream the butter, sugars, and vanilla extract until all combined. Beat in the two eggs one at a time. Combine the flour, salt, and baking soda. Slowly add the dry ingredients into the wet until all is mixed. Finally, stir in the chocolate chips. Let that sit aside while you make the brownie batter and try to not eat all the dough. Cookie dough is my weakness...


For the Brownies
Combine brownie mix, water, oil, and eggs until all the mix is moistened. It's ok if their are some lumps.


Assembly
You can either line muffin tins with papers or spray them very well with cooking spray. Press cookie dough into each muffin well until it is about half full. Next, press an Oreo into each well.


Finally, top the wells off with brownie batter until the Oreos are covered.


Place the deliciousness into the oven for 16-18 minutes or until brownie top is done. Let the pan cool for about 5-10 minutes before lifting the liners out. If not using liners, let the brownies cool even longer before trying to remove them. You can let them cool completely before eating them, but you might as well try one while they are warm. I have also heard these are good with vanilla ice cream on top, but I never make it that far. My only regret is that I didn't take a picture of this sliced open...it's beautiful when you see the layers.

I was testing liners vs. non-liners..both are amazing :)


Monday, January 23, 2012

My Favorite Chocolate Chip Cookies


So there are a lot of different Chocolate Chip Cookies recipes and I'm sure many of you have tried lots of different ones; I know I have. I have several recipes that I like, but when I came across this recipe from Tessa at Handle the Heat, I knew I had found something special. The texture of these cookies is how all chocolate chip cookies should be. They are chewy and stay that way for a few days. I took a batch of these to school last year and several people told me these were the best cookies ever. I made them again recently and go similar reviews. LSH took some to law school and most of them were devoured quickly. One great thing about this recipe is that the dough really isn't that tasty. If you are like me, eating the raw cookie dough is a huge temptation. This dough is not that tempting and is much better saved for cooked cookies. :D

Time: 60ish minutes by the time you get them all baked
Makes about 4 dozen cookies
Ingredients
1 cup butter, softened
1 cup white sugar
1 cup brown sugar
2 eggs
2 tsp vanilla
1 tsp baking soda
2 tsp hot water
1/2 tsp salt
3 cups all-purpose flour
2 1/2 cups chocolate chips

Preheat oven to 350 F.

Cream together the butter and both sugars in a big bowl until smooth. Beat in the eggs one at a time and finish off with the vanilla.

Dissolve the baking soda in the hot water and add it to the batter. (I think this is the step that does something special to the texture of the cookies. I had never made a recipe that did this before.) Finally add the salt.

Stir in the flour one cup at a time using a heavy-duty spatula (I almost broke a plastic one doing this). Keep adding the flour until everything is incorporated. Once everything is mixed, add in the chocolate chips. The original recipe called for 2 cups, but I like a high ratio of chips to dough so I added some more.


Once chips are folded in, use a spoon or a spiffy cookie scoop to drop large globs of dough onto a parchment-lined baking sheet.


Leave some space between them because they will spread a bit.


Bake them for 10-12 minutes or until the middles are set and the edges are starting to brown. Let them sit on the pan for about 2 more minutes and then move them to a cooling rack.

Let them cool, or not, and enjoy with a tall glass of milk!


Original post at http://www.handletheheat.com/2011/05/classic-chocolate-chip-cookies.html