Showing posts with label chicken. Show all posts

Saturday, September 22, 2012

Enchiladas (With Homemade Sauce)

Enchiladas are one of those dishes that can be made in so many different ways with different fillings, sauces, textures, etc. I've always enjoyed enchiladas but was never big on making them until the past few months. I came across a homemade red enchilada sauce from Recipe Girl and thought it was worth a try. I had only liked homemade enchiladas with white sauce, but only because I don't like canned red sauce. This recipe provided a solution to that issue. I will the sauce recipe and how I prepare my enchiladas. Take it and run with it!

Time: Sauce: about 15-20 min; Enchiladas: about 30-45 min (depends how speedy you assemble.)
Makes 6-8 enchiladas and about 2 1/2 cups of sauce
Ingredients for sauce
1/4 cup vegetable or canola oil
2 Tbs flour
2 Tbs chili powder
1 can (8 oz) tomato sauce
1 1/2 cups chicken broth
1/2 tsp cumin
1/2 tsp garlic powder
1/2 tsp onion salt (or just regular salt)
1/4 tsp salt (or just to taste)
Dash of pepper

Ingredients for enchiladas
2 cups cooked chicken, shredded
2 cups grated cheese (whatever kind floats your boat)
1/2 onion, diced (opt.)
1 bell pepper, diced (opt.)
sauce
6-8 flour tortillas, soft taco size

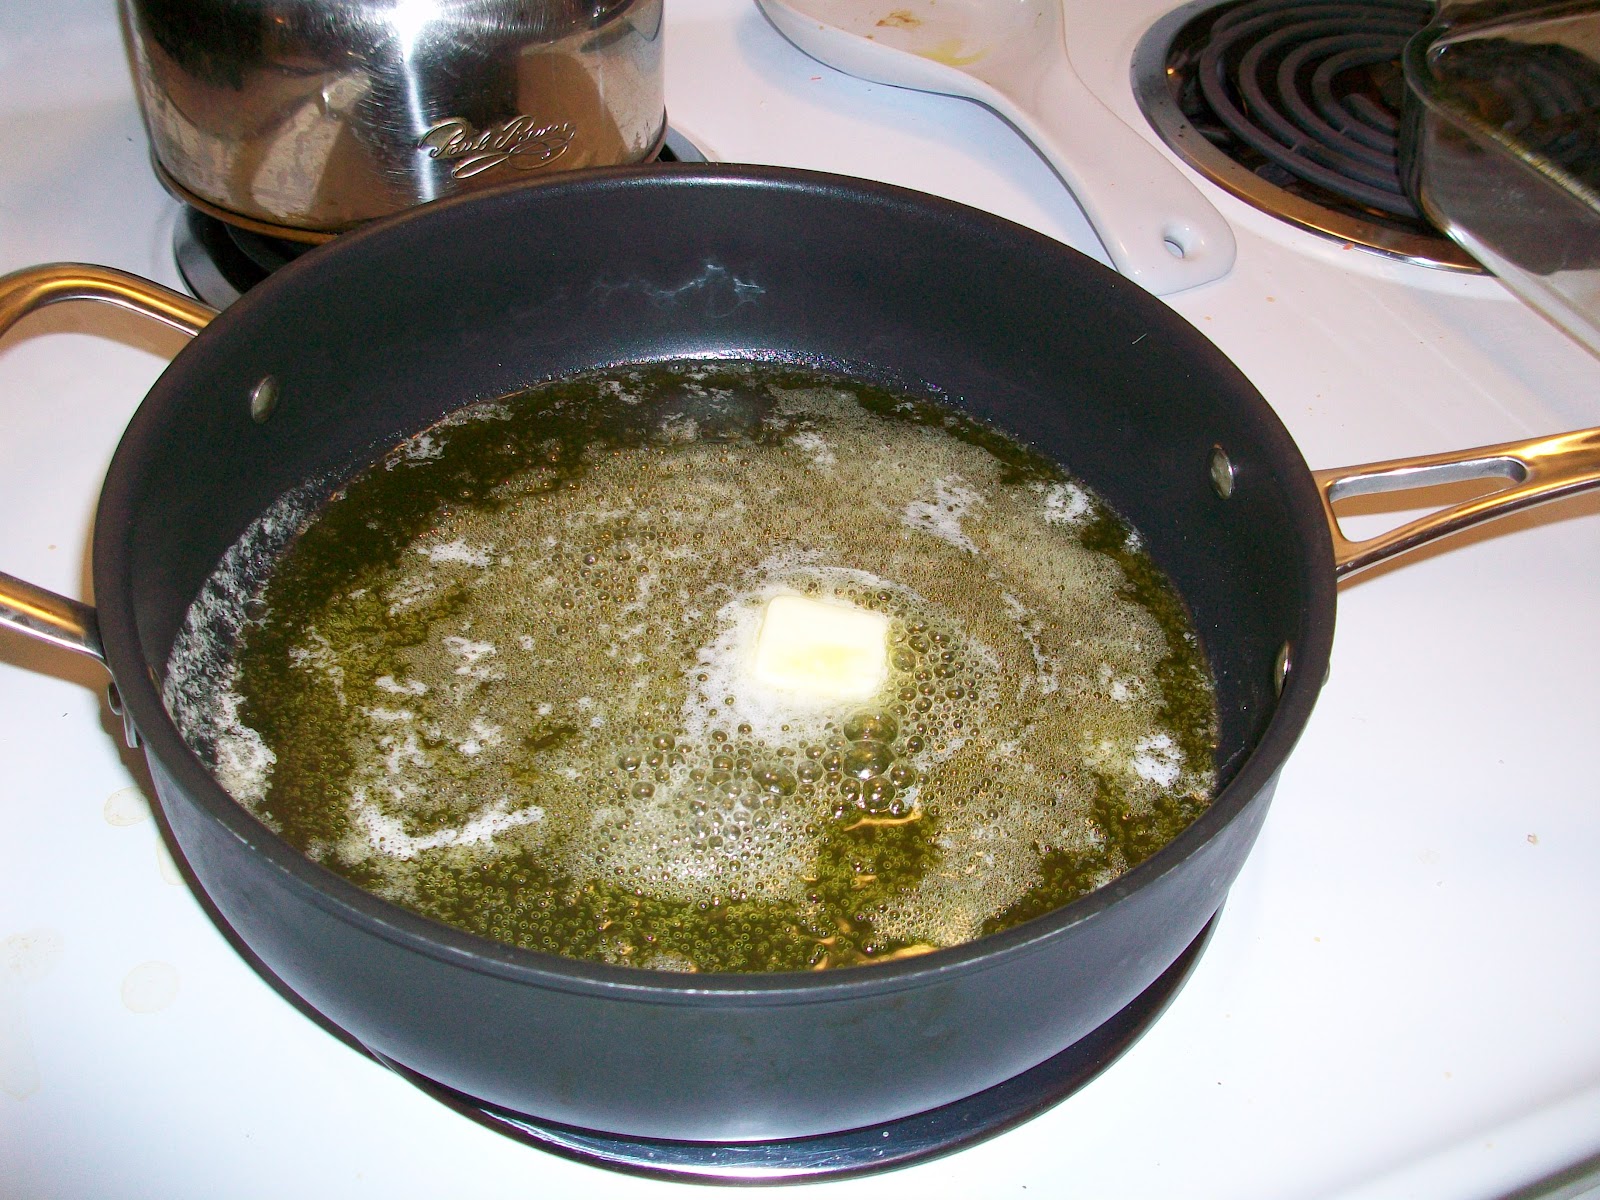
To get the sauce going, heat the oil in a skillet or sauce pan over medium high heat until it shimmers. Whisk in the flour and chili powder and reduce the heat to medium. Keep whisking until the mixture is smooth and becomes slightly golden.

Needs just a bit more time at this phase.
Once the roux is ready, gradually whisk in everything else. Keep whisking and stirring until it's smooth. Make sure to taste it and adjust the spices as you need. Let it simmer over medium-low to medium heat for about 10 minutes or until it is the desired consistency. It will thicken the longer it sits.

After about 10 minutes it will thicken up and look like thick tomato soup. Set this aside until you are ready to assemble the enchiladas.


While your sauce is simmering, you can mix up your enchilada filling. If you are using veggies in the filling, I recommend sauteing them until they are slightly tender first. Toss the chicken, 1 cup of cheese, and veggies in a bowl to combine. Add in the amount of sauce you want. I start with 3/4 or 1 cup and decide from there.
  

Once your filling is to your liking, start filling! I just scoop 2-3 big spoonfuls into to middle of a tortilla and go from there. From here on it's really all about preferences.While you are doing this go ahead a preheat your oven to 400 F.


Roll up all your enchiladas and place them in a lightly greased dish. If you want to put sauce in the bottom of the dish, go for it. I prefer not to. The next step is another one based on preference. I like to bake my enchiladas naked until they start to brown on top, about 10 minutes.


I do that because I don't like squishy enchiladas. This step just helps them keep their structure. If you don't want to do that, pour the sauce on top, sprinkle the cheese and bake. If you are like me, bake the naked enchiladas until brown and then top with sauce and the rest of the cheese. *A word on the sauce. The last time I made these, I used all the sauce. If you like saucy enchiladas, use the whole recipe. I don't like them real saucy, so I don't use all of it. Use what you want.
 

 Bake those suckers until the sauce is bubbly and the cheese is melted. Finally, dig in!


Enjoy!

Original post at http://www.recipegirl.com/2006/05/01/enchilada-sauce/

Thursday, August 30, 2012

Garlic Chicken Pasta

Mmmmm...pasta.. I really love it. I try to only make it once a week. Normally that does satiate my cravings, but some times I want it more! This week I broke down and made pasta dishes twice. I threw together an Asian noodle dish with some leftover spaghetti noodles and veggies that needed to be eaten a couple days ago and tonight I made this Garlic Chicken Pasta that I came across on Kevin & Amanda's blog. They adapted it from another blog and I am now adapting it from them. It delicious as is, but I think it is even better with my additions.

If you are on some sort of diet that says no pasta, cream, or bacon, I would stop reading now. If you love everything delicious, continue. This pasta has a sauce very similar to alfredo, but it has a kick. It doesn't take long at all and it is a great weeknight dinner.

Before I go any further, I should mention that TBDH is no longer To Be Determined Husband! He recently accepted a job as Technology Support Specialist in a small school district and is enjoying his job so far. So exciting! But now he needs a new name! My brain is a little dead and I am not feeling very creative so I will have to come up with something before my next post. Now back to deliciousness.

Time: 20ish minutes
Yield: about 4 servings
Ingredients
10-16oz pasta (depending on what kind of pasta:sauce ratio you like)
1 1/2 of cooked, shredded chicken (or however much you want, really)
6-8 slices cooked bacon crumbled
 2 Tbsp butter
3 gloves of minced garlic
1 cup heavy whipping cream
Couple tsp of black pepper (depending on taste)
3/4 cup shredded Parmesan cheese
1/4 cup white wine
Dashes of cayenne pepper, oregano, and basil (or other desired herbs)

Prepare the pasta and drain. For two of us I used about 3 handfuls of pasta. The original recipe calls for Farfalle, but I used Penne this time. It's really up to you. Dump the pasta back into the pot and toss the chicken with it. Let it hang out while you prepare the sauce.


Melt the butter in a saucepan over medium-low heat. Toss in the garlic and stir.


Add in the whipping cream, pepper, wine, and spices/herbs.


Stir to combine and whisk in Parmesan cheese. Whisk the sauce until smooth. It will probably take 3-4 minutes. Taste and adjust for preferences.


Stir bacon into sauce.

I could eat this whole little bowl...
Dump sauce on top of pasta/chicken mixture. For best results let the pasta sit for a few minutes to thicken and combine. Now try to not eat every last bit by yourself!


Original sources 
http://www.kevinandamanda.com/recipes/dinner/becky-higgins-garlic-chicken-farfalle.html
http://www.beckyhiggins.com/recipes/?p=21

Monday, April 2, 2012

Creamy Chicken Taquitos

Food that can be homemade and frozen are amazing. I never really like store-bought taquitos, but these are pretty tasty, and I know everything that is in them. These are one of those foods that are easy to throw together, freeze, and pull out another day for deliciousness. If you are a fan of those dry freezer taquitos, please try these from A Homemade Kitchen. They are worth your time to make them.

Time: 20 minutes to prep, 20 to bake
Ingredients
3 ounces cream cheese, softened
1/4 cup salsa
1 Tbsp lime juice
1 tsp chile powder
1/2 tsp cumin
1/2 tsp onion powder
1 finely minced garlic clove
3 Tbsp chopped cilantro (I never have this, but have been told parsley can substitute. I just sprinkle some in)
1 small roasted red bell pepper, finely chopped
1-2 green onions, sliced
2 cups cooked shredded chicken (I used rotisserie chicken last time..worked great!)
1 cup shredded cheese (I used colby-jack but use what you want)
10-12 6 inch flour or corn tortillas (I prefer flour)
cooking spray
salt

If you roast your own bell pepper, start this first. If you don't know how, here is a quick rundown. Cut the pepper in half and remove seeds and whatnot. Stick it cut side down in an oven under the broiler. Leave it in there until the skin starts turning black and blistering. Take it out and immediately put the pepper in a plastic baggie and seal it. Once the pepper has cooled down, take it out and peel the skin off. Continue with everything else.

Your pepper should look something like this when you take it out of the oven.
Mix everything except the last three ingredients in a medium mixing bowl. Really...that's all you do..

First 10 ingredients...

+ cheese and chicken..
Warm the tortillas slightly in the microwave. I suggest putting a few between two paper towels and nuking them for about 10-15 seconds or until they are soft. Spoon your nummy mixture into the middle of the tortillas.


Roll them up!


If you are going to bake them now, put them on foil or parchment paper, spray the tops with cooking spray and sprinkle with salt. Pop them in the oven for 15-20 minutes at 425 until they are crispy and lightly golden. the cooking spray is to help them crisp up. If you prefer other oils, go for it. My brother is a fan of bacon grease. If you have some, go for it. Sadly I did not take a picture of the baked one...next time...

If you are not going to cook them yet, roll them up and put them on a baking sheet and pop them in the freezer until they are solid. Transfer them to a plastic bag and you are good to go! When you are craving one, put them on a sheet, spray and sprinkle and bake! They might need a bit more time to bake but they are still delish!

Original post at http://www.handletheheat.com/2011/10/homemade-kitchen-creamy-chicken.html

Saturday, March 31, 2012

Baked Buffalo Chicken Mac and Cheese


Mac and Cheese is one of those comfort foods that everyone loves in some form. Growing up, I never had the stuff from a box, and I was OK with that. Mom always made it from scratch using Velveeta, milk, butter, and whatever pasta we happened to have. As I started making it for myself I started adding pepperjack cheese, broccoli, bread crumbs, and baking it from time to time. Then one day I came across this recipe from How Sweet It Is and we decided we should try it. (By the way, that blog is definitely worth a look...good stuff happens there..)

On a side note, Law School Husband made a big decision this week. He decided that he did not want to continue this career path. After talking with several professors, friends, and me, he withdrew from school and is now searching for what will truly make him happy. I am very supportive of this decision, however I can no longer call him Law School Husband! From now on, he will be known as TBDH (to-be-determined-husband or the-best-damn-husband).

Back to food, I am not typically a fan of food that has buffalo in the title, but this intrigued me. It doesn't have much buffalo sauce and it is a change from standard mac and cheese. So we gave it a shot. I have made this several times now and it gets better every time I make it!

Time: 35ish min
Ingredients
1 lb pasta (shells, elbow macaroni, whatever floats your boat)
2 cups of cooked chicken, shredded or cubed (I almost always use some sort of leftovers for this)
1 Tbsp butter
1 Tbsp flour
1 1/2 cups milk
1 cup shredded monterey jack cheese, about 4 oz or half a small brick
1/3 cup shredded cheddar, and a little extra for topping
1/3 cup buffalo sauce
1 tsp garlic pepper
salt and black pepper
1/3 cup bread crumbs

Preheat oven to 375 F.

Cook chosen pasta according to standard directions, drain and set aside.

In a medium-sized sauce pan over medium heat, melt the tablespoon of butter. When it had melted, add the flour and whisk to make it smooth. Let your roux sit for a bit and get a pretty golden color.

Yours should look more golden than this...remember I do food, not photography.

Once the roux has become golden, add the milk and stir to mix in the roux. Continue to whisk or stir until the milk has thickened. Next, add in the grated cheese and keep stirring until the cheese melts in to the milkyness and everything become smooth.

   
Not quite smooth at this point..

Once it is all smooth, add in the buffalo sauce and garlic pepper. Stir it all up and add salt and pepper to taste.

So orange and delicious...
It if seems a little thin, it will be ok. Baking it helps it thicken a bit more. Once the sauce is seasoned to your liking, combine the pasta, chicken and sauce. I just dumped everything into the pot I cooked the pasta in but do whatever you please.


Mix it all up until everything is combined. Grease a 9x13 pan or a preferred casserole dish. This can also be made in individual ramekins if you feel like it. Dump the mixture in and make it even.

Mine is much small than a 9x13, but I was also only making a half recipe.

Top you pasta with some extra cheddar cheese and bread crumbs and throw it in the oven!

Mine was already in the oven before I realized I needed to snap a picture.
After about 20 minutes, the cheese should be bubbly. I recommend turning the broiler on for 3ish minutes to help the bread crumbs crisp up more and create a nice crust on top.


Dish it up and enjoy!

I'm tempted to try this with bacon, but TBDH was sure how the bacon would be with buffalo sauce...I just really like bacon. It is suggested in the original posting to top your plate with green onions, Gorgonzola cheese, extra buffalo sauce, or cilantro, but we like it just as it is.

Original post at http://www.howsweeteats.com/2011/05/baked-buffalo-chicken-pasta/

Wednesday, March 21, 2012

Creamy Cajun Pasta

I didn't realize until a friend asked me about my blog that I haven't posted in almost a month. School has been crazy! Everything has been piling up and my blog has honestly slipped my mind. But I'm back! It's spring break and my batteries are slowly recharging. I plan to start posting more frequently again. The recipe for today is one that I have made several times and that I have started spotting on pintrest. Cajun Chicken Pasta comes from the popular Ree Drummond ThePioneerWoman.com. If you have not visited her site, your probably should. She has some amazing recipes on there and even has her own book now. Good stuff. This pasta is absolutely delicious if you like spicy, creamy pasta. It's got a cajun zing, veggies, and a creamy sauce to top of your pasta of choice.

Time: 30-40 minutes (depends on how fast you chop and slice things)
Ingredients
3 chicken breasts cut into cubes (I normally use 1 huge one for LSH and I and it makes plenty)
4 tsps cajun mix (use whatever you have or the recipe to follow)
1 lb pasta (Pioneer Woman uses fettuccine but I just use whatever long pasta we have.)
2 Tbsp olive oil
2 Tbsp butter (You know it's good when olive oil AND butter are involved.)
1 whole green bell pepper sliced
1 whole red bell pepper sliced
1/2 onion sliced (she used red but I always use yellow)
3 cloves garlic, minced
3-4 Roma tomatoes, diced
1/2 cup white wine
2 cups chicken broth
1 cup heavy cream
Cayenne pepper
Salt
Pepper
Parsley

Go ahead and cook the pasta according to directions and let it hang out while you get everything else cooked.

Before you do anything else, make sure you have all your ingredients ready to go. I'm lazy and do not always prep my ingredients before I start cooking. You better do the right thing and prep for this one or else you will have some issues. Cube that chicken, slice those veggies, and have cups ready for you broth and cream. Also have a whisk available.


Toss the cubed chicken with 2 tsp Cajun seasoning.

Pour 1 Tbsp olive oil in a deep heavy skillet (preferably not non-stick) over medium high heat and introduce the oil to 1 Tbsp of butter. I'm not really sure why both are necessary, but it doesn't seem like something to be messed with. Once the oil and butter are well acquainted, throw in the chicken and watch it sizzle. Brown the chicken on all sides and remove it to a plate. The chicken does not get fully cooked in this step.


Leaving the pan hot, add in the other Tbsp of oil and butter and let them get reacquainted. Throw in the peppers, onions, and garlic. Careful with this step because stuff my sizzle and pop as it hits the pan! Sprinkle on the other 2 tsp of Cajun seasoning and cook over the high heat. The goal is to stir slowly and allow the veggies to blacken as much as possible. Once they are good and blackened, toss in the tomatoes and cook for another 30 seconds or so. Remove the veggies to the same plate or bowl as the chicken.

Still keeping the pan over high heat, pour in the wine and chicken broth. Scrape the bottom of the pan as the liquids heat up and get all those blackened goodies incorporated into the sauce. When it starts to boil, reduce the heat to medium low and pour in the cream whisking fiercely. Cook the sauce until it starts to thicken. At this point, taste and decide if cayenne pepper, black pepper, or salt are needed. We like it spicy but it's up to you.


Once it has thickened a bit more, add the chicken and veggies to the sauce, including all the juiced from the plate/bowl. Stir over medium heat for a couple minutes until the sauce thickens even more and is bubbly.

When it has reached your desired consistency, toss in the pasta and mix it all up. Top with a bit of parsley and you are good to go! FYI, the longer this pasta sits, the thicker it will become.
 
Original recipe: http://thepioneerwoman.com/cooking/2011/09/cajun-chicken-pasta/

Cajun spice mixture (from TLC Cooking)
1/4 cup salt
2 Tbsp cayenne pepper
2 Tbsp paprika
1 1/2 Tbsp onion powder
2 Tbsp black pepper
1 Tbsp garlic powder
1 tsp dried oregano
1/4 tsp dried thyme
1/8 tsp dried cloves

Mix it all together! This makes a lot but it's a good spice mix to just have on hand. It keeps well in a air-tight container.

Sunday, February 19, 2012

Fake Chicken Vindaloo


I don't claim to be a food expert at all, but I know what tastes good to me and what doesn't. For those of you who are experts, good for you and don't chastise this Vindaloo recipe. I did say it was fake. For those of you who have no idea what Vindaloo is...awesome! I know you won't judge me. Regardless of how accurate this recipe is, it's tasty if you are looking for something rich and curryish. This recipes comes from The Food in my Beard and is meant to be eaten in arepas. However, LSH and I decided to eat it over rice. Eat it however you want. This Vindaloo comes together pretty quickly and can be easily adapted. The measurements I will put for this recipe are approximate. I'm pretty sure I ended up adding way more curry powder and some other assorted spices. I also added potatoes. I made this own a while ago and we decided that potatoes would make it even better and they sure did. Play with it and make it your own!

Time: 30-45 minutes
Ingredients
2 sliced onions
2 1/2 Tbsp curry powder
3-5 chiles, depending on what heat you want, sliced (I used whatever was frozen in my freezer..I think jalapenos and Thai chiles were involved...)
Ginger (the original post recommends fresh, but I used powdered) - use however much you are comfortable with
5 cloves of minced garlic
4 chicken breasts
2 cups chicken broth (or enough to cover the chicken breasts in a pan)
1-2 potatoes diced
Hot cooked rice

Start with a deep skillet with a bit of olive oil over medium heat. Toss in the onions and soften them. As delicious as caramelized onions are, don't let them get to this point. Add in the curry powder, chiles, ginger, and garlic. Cook for 2-3 minutes until everything is softened and mixed. Throw the whole mixture in a food processor or blender and transform it into a paste. It's ok if there are still some chunks. It's up to personal preference. At this point you can try it and see if it needs more of something.

Sear both sides of the chicken breasts in the skillet. Add in the paste and cook for about 2 minutes still over medium heat. Pour in the chicken broth until the chicken is covered. You might use all of the 2 cups, you might need more, you might need less. Just cover those breasts... Stir it all around until the sauce smoothens out.


Add in the potatoes and simmer the lovely mixture until the chicken is completely cooked through and the taters are soft.


Add this point you can do what you want with the chicken. I took it out, shredded it, and then tossed it back into the sauce and we ate it over rice. Deliciousness...


Original post at http://www.thefoodinmybeard.com/2011/01/chicken-vindaloo-arepa.html

Saturday, February 4, 2012

Comfort Food: Chicken Noodle Soup Casserole


Some days you just need a high-calorie, dense, creamy comfort food. This is one of those foods. LSH and I were in the mood for some warm edible comfort so I thought I would give this recipe a try. I came across a couple recipes for this type of dish, but the base that I used was from Bobby at blogchef. It seemed like it would provide the highest calorie of comfort with the most substance so we gave it a shot and altered it a little bit. So if you are in the mood for something easy and comforting, give it a try!

Time: 40-60 min
Ingredients
2-4 boneless skinless chicken breasts
6 ounces egg noodles (it's about half of a big bag of noodles)
1 can cream of mushroom soup
1 can cream of chicken soup (You can always use 2 cans of this instead of 1 of each. LSH hates mushrooms so that's what we did.)
1 cup sour cream
1-2 cup carrots, chopped
oil
salt and pepper
1/2 tsp turmeric (optional)
1-2 cups shredded colby jack cheese
1 cup crushed buttery crackers (like Ritz)
1/4 cup butter

If you do not have pre-cooked chicken, you can season the breasts with salt and pepper and throw them in a skillet with a bit of oil on medium heat. Flip the breasts once until they are fully cooked. Cut the chicken into small pieces or shred it. I think we did cubes more or less.

Preheat oven to 350.

 Cook the egg noodles according to the package. Drain them when they are done.

While the noodles cook, saute the carrots with a bit of oil in a skillet over medium heat. The goal is to tenderize them a bit. We didn't do this but it is a good idea to.

Once noodles are cooked and carrots are sauteed, mix together the two cans of creamed soup and cup of sour cream in a large bowl. Season the mixture with salt and pepper and turmeric if you want and any other desired seasonings. Toss in the carrots and the noodles and mix it up. Finally, toss in the chicken. At this point, you should have a large bowl of creamy deliciousness.

Lightly grease an 8x8 pan and dump the whole mixture in.

Melt the butter and stir in the crackers. These tasty little crumbles get put on top of the casserole with the desired amount of cheese. The crackers add an amazing salty, crunchiness.


Stick it all in the oven and cook for 30-35 minutes or until the casserole is cooked through and the topping is browned.

Let it cool a little bit then serve a big gloppy spoonful and relish in the comfort. :D
The original recipe says this serves 4, but that seemed ridiculous to LSH and I. We think it serves 5-6 people.


Original post at http://blogchef.net/chicken-noodle-casserole-recipe/

Thursday, January 12, 2012

Cold Night Coconut Curry Soup

I've been wanted to make this recipe for a while because it just sounded good. Tonight was the perfect night for soup. It is absolutely freezing outside! This soup is warm, slightly thick, and has some heat. It was the best choice for tonight because it was very easy to make and came together quickly. This soup came from a blog I have already referenced once here. This soup came from Mel's Kitchen Cafe and I would definitely give it a try. I made some alterations to the recipe and it got even better. Oh, and there are pictures for this recipe! They aren't very good, because photography is not my thing, but there are pictures!

Time: 30-40 minutes
Ingredients
 2 Tbsp olive oil
 1 1/2 lbs chicken breast (2-3), cut into 1-inch pieces
 salt and pepper
1/2 chopped yellow onion
1 red bell pepper, chopped
2 cups chicken broth
1 can coconut milk
1/2 Tbsp fish sauce
1/8 tsp cayenne pepper
1 Tbsp brown sugar
1-1 1/2 Tbsp curry powder (depend on how much curry flavor you want)
1/2 Tbsp jalapeno curry powder (we used this and it was delicious)
1 Tbsp fresh lime juice
Salt and pepper to taste
3-4 cups hot rice

Heat the oil over medium heat in a large pot. Pat the chicken pieces dry and season them with salt and pepper while the oil gets nice and hot. When the oil is shiny, throw in the chicken pieces and let cook for 1-2 minutes, stirring a bit. Add in the bell pepper and onion and cook for 2-3 minutes until the veggies are tender. The chicken does not need to fully cook in this step.

Add the chicken broth, coconut milk, fish sauce, cayenne pepper, curry powder, and brown sugar. Stir it up and bring it to a simmer. Let the soup simmer gently for about 10-15 minutes or until the chicken is cooked through and the broth has thickened.

Stir in the lime juice. The original recipe called for a bit of cilantro but we don't typically keep that so I sprinkled in a bit of parsley on top. Serve the soup on top of a bit of hot rice and warm up!
 Original soup recipe at http://www.melskitchencafe.com/2011/01/coconut-curry-soup.html.
Check out this blog for great recipes!

Sunday, January 8, 2012

Restaurant Quality Chicken Parmesan


Edit: This now has pictures! I can finally use my camera, but I have gone so long without using it that I neglected to use it when I made pizza last night and when I made this Chicken Parmesan from Someone Left the Cake Out in the Rain tonight. Both recipes will definitely be made again in the future so I will add pictures at that time. LSH has been craving Italian food for a while and when he saw Chicken Parm on my list of possible recipes for the week, he said he definitely wanted me to try that one. I never got to it during the week, but it seemed like a great idea for a Sunday night. We were not disappointed. Like with most Italian food, we were stuffed by the time we finished. LSH rubbed his belly as he said this was better than any restaurant Chicken Parmesan he had ever had. I asked if this recipe was a keeper and he said "Definitely...all the days!" That's how I know a recipe is a keeper.

Next time I will definitely serve smaller plates. I'm also anxious to see how it tastes as leftovers since it seems like the type of food that would get richer the longer it sits. This recipes is pretty easy, but does take some time because you make the sauce from scratch and it is best simmered for a bit. If you love a good chicken parm and have a bit of time on your hands, I would definitely try this.

Time: 90ish minutes
Ingredients
3 Tbsp olive oil
1 Tbsp butter
1 small onion, chopped
4 cloves of garlic
3/4 cup red wine
1 28 oz can crushed tomatoes
1 14.5 oz can crushed tomatoes
2 tsp salt
2 Tbsp sugar
Black pepper and any other desired herbs (I went with oregano, basil, garlic powder, cayenne pepper, and crushed red pepper)

4-6 chicken breasts
3/4 cup flour
1/2 tsp salt
1/2 tsp pepper
3 eggs, beaten
2 cups Italian breadcrumbs
1/2 cup olive oil
2 Tbsp butter

1 cup parmesan cheese (not the kind in a can; we used the stuff in a bag and it was fine)
1 8oz block mozzarella cheese, sliced
1 lb fettuccine or other long noodle (we used angel hair)

Heat your stove to medium-low heat. Pour your 3 Tbsp olive oil into a wide deep pan or a pot. You need something big enough for all the sauce. Add the Tbsp of butter and let it melt completely. You could probably leave out this extra butter and just use the olive oil, but why would you leave out butter? Once the oil is warm and the butter melted, add in the onion and the garlic. Saute until the mixture is fragrant and tender.

Add the wine (steal a sip or two from the bottle) and let the mixture bubble. Once the wine has reduced by about half, add in the cans of tomatoes with the salt, pepper, and sugar. Mix it up and you can choose to add your seasonings now or later. I added them now because I wanted the flavors to simmer all together. Let mixture simmer on medium-low heat for as long as you have. 30 minutes is a good minimum time. I covered the pot while it simmered because it was bubbling all over my stove.

While the sauce ingredients get to know each other, you can start on the chicken. Start by pounding the chicken breasts until they are about 1/4 of an inch thick. I recommend putting the chicken in a bag or putting it between wax paper or plastic wrap. It eliminates ickyness. Once the chicken is nice and flat, trim off the extra fat and whatnot.


Preheat the oven to 350.

Now comes the fun part of dredging. Mix together the flour, salt, and pepper and put it on a plate or in a shallow dish. Beat the eggs into a bowl. Finally, put the bread crumbs on another plate or shallow dish.


Pat the chicken breasts dry and toss them in the flour. Tap off any excess flour and dip into the egg. Let the egg drip off a bit and then completely coat the chicken breasts in the bread crumbs. Let the chicken breasts hang out on a plate while you get the next step ready.


Don't forget to stir your sauce! If you think it is done you can take it off the burn and let it chill out. Now back to the chicken....pour the 1/2 cup of olive oil into a pan and add the butter. Once it is all melted and hot, gently place the chicken in the pan.


There is no need to cook all the chicken at once, cook it in as many batches as needed. Let the chicken sit for about 3 minutes on one side and then flip and sit for another 3. There should be a beautiful golden brown crust on both sides of the chicken. It really is a beautiful sight.


Finally it is time to assemble it all! Pour about half of the sauce into the bottom of a 9x13 pan. Place the breaded chicken breasts on top of the sauce. Now top the chicken with the rest of the sauce.


Now it's time for the cheese. Sprinkle the parmesan cheese on top of each chicken breast and then top that with slices of mozzarella. Now you should see a pan of sauce with mounds topped with cheese. Yum!


Place the pan into the oven and let it cook for about 20 minutes or until the chicken is completely done and the cheese is melted. While the chicken bakes, prepare your pasta according to the directions.

Once the chicken is done serve it hot on top of the pasta with some extra sauce.

I recommend starting with eating half of a piece of chicken. LSH and I both ate a whole piece are are now uncomfortably full. It was delicious but pace yourself!

Also, if you halve the chicken in the recipe, I would halve the sauce too. I made a half recipe of chicken but made all of the sauce because we like a lot of sauce. With this recipe it was definitely too much. Enjoy the deliciousness!

Source: http://someoneleftthecakeoutintherain.wordpress.com/2009/11/20/crazy-good-chicken-parm/#more-107