Monday, January 23, 2012

My Favorite Chocolate Chip Cookies


So there are a lot of different Chocolate Chip Cookies recipes and I'm sure many of you have tried lots of different ones; I know I have. I have several recipes that I like, but when I came across this recipe from Tessa at Handle the Heat, I knew I had found something special. The texture of these cookies is how all chocolate chip cookies should be. They are chewy and stay that way for a few days. I took a batch of these to school last year and several people told me these were the best cookies ever. I made them again recently and go similar reviews. LSH took some to law school and most of them were devoured quickly. One great thing about this recipe is that the dough really isn't that tasty. If you are like me, eating the raw cookie dough is a huge temptation. This dough is not that tempting and is much better saved for cooked cookies. :D

Time: 60ish minutes by the time you get them all baked
Makes about 4 dozen cookies
Ingredients
1 cup butter, softened
1 cup white sugar
1 cup brown sugar
2 eggs
2 tsp vanilla
1 tsp baking soda
2 tsp hot water
1/2 tsp salt
3 cups all-purpose flour
2 1/2 cups chocolate chips

Preheat oven to 350 F.

Cream together the butter and both sugars in a big bowl until smooth. Beat in the eggs one at a time and finish off with the vanilla.

Dissolve the baking soda in the hot water and add it to the batter. (I think this is the step that does something special to the texture of the cookies. I had never made a recipe that did this before.) Finally add the salt.

Stir in the flour one cup at a time using a heavy-duty spatula (I almost broke a plastic one doing this). Keep adding the flour until everything is incorporated. Once everything is mixed, add in the chocolate chips. The original recipe called for 2 cups, but I like a high ratio of chips to dough so I added some more.


Once chips are folded in, use a spoon or a spiffy cookie scoop to drop large globs of dough onto a parchment-lined baking sheet.


Leave some space between them because they will spread a bit.


Bake them for 10-12 minutes or until the middles are set and the edges are starting to brown. Let them sit on the pan for about 2 more minutes and then move them to a cooling rack.

Let them cool, or not, and enjoy with a tall glass of milk!


Original post at http://www.handletheheat.com/2011/05/classic-chocolate-chip-cookies.html

Monday, January 16, 2012

Gooey Chocolate Cookies and Cream Bars

I haven't baked in a long time so I have taken advantage of this long weekend to bake three different things! Two things I have made before, but this recipe is a new one. LSH and I were invited to a friend's house for dinner and he volunteered me to bring dessert. I love excuses to try new sweets! I decided to try Gooey Cookies and Cream Double Chocolate Cake Bars from Picky Palate. I have made a few things from this blog and they have all been good. I can't take credit for any of this recipe because I did not alter anything. It's delicious just as it is.

Time: 40 minutes
Ingredients
1 Devils Food Cake mix
1 stick of butter, softened
1 large egg
14 Oreos, broken into pieces 
1 14oz can sweetened condensed milk
1 1/2 cups chocolate chips


Preheat the oven to 350 and line a 9x13 pan with aluminum foil. Grease the bottom and edges of the foil really well. If you don't, the bars will never want to leave the foil.

Mix cake mix, stick of butter, and egg in a large bowl. You can use a spatula or spoon if you want, but it really is easier to use your hands. It's great stress relief and it feels cool.


Once it is mixed up, press the dough into the prepared pan. Again, you can use a spoon but hands work best.

Sprinkle the broken Oreos on evenly top of the prepared batter. Next open up the can of condensed milk and pour it over everything. This ingredient is what brings all this together for me. It gives the bars a caramel taste on top of the cookies and cream and chocolate. It's amazing.

Finally, sprinkle chocolate chips over everything.

Put it in the oven and let it bake for about 25 minutes or until the base is done. Now comes the tricky part...you must let it cool! If you absolutely can't wait, I suggest a spoon or else it will just fall apart. When it is cool you can carefully lift the foil out of of the pan. Carefully peel the foil away and cut bars into whatever size you want. Now try not to eat the whole pan!


Original post at http://picky-palate.com/2011/07/05/gooey-cookies-and-cream-double-chocolate-cake-bars/

Thursday, January 12, 2012

Cold Night Coconut Curry Soup

I've been wanted to make this recipe for a while because it just sounded good. Tonight was the perfect night for soup. It is absolutely freezing outside! This soup is warm, slightly thick, and has some heat. It was the best choice for tonight because it was very easy to make and came together quickly. This soup came from a blog I have already referenced once here. This soup came from Mel's Kitchen Cafe and I would definitely give it a try. I made some alterations to the recipe and it got even better. Oh, and there are pictures for this recipe! They aren't very good, because photography is not my thing, but there are pictures!

Time: 30-40 minutes
Ingredients
 2 Tbsp olive oil
 1 1/2 lbs chicken breast (2-3), cut into 1-inch pieces
 salt and pepper
1/2 chopped yellow onion
1 red bell pepper, chopped
2 cups chicken broth
1 can coconut milk
1/2 Tbsp fish sauce
1/8 tsp cayenne pepper
1 Tbsp brown sugar
1-1 1/2 Tbsp curry powder (depend on how much curry flavor you want)
1/2 Tbsp jalapeno curry powder (we used this and it was delicious)
1 Tbsp fresh lime juice
Salt and pepper to taste
3-4 cups hot rice

Heat the oil over medium heat in a large pot. Pat the chicken pieces dry and season them with salt and pepper while the oil gets nice and hot. When the oil is shiny, throw in the chicken pieces and let cook for 1-2 minutes, stirring a bit. Add in the bell pepper and onion and cook for 2-3 minutes until the veggies are tender. The chicken does not need to fully cook in this step.

Add the chicken broth, coconut milk, fish sauce, cayenne pepper, curry powder, and brown sugar. Stir it up and bring it to a simmer. Let the soup simmer gently for about 10-15 minutes or until the chicken is cooked through and the broth has thickened.

Stir in the lime juice. The original recipe called for a bit of cilantro but we don't typically keep that so I sprinkled in a bit of parsley on top. Serve the soup on top of a bit of hot rice and warm up!
 Original soup recipe at http://www.melskitchencafe.com/2011/01/coconut-curry-soup.html.
Check out this blog for great recipes!

Sunday, January 8, 2012

Restaurant Quality Chicken Parmesan


Edit: This now has pictures! I can finally use my camera, but I have gone so long without using it that I neglected to use it when I made pizza last night and when I made this Chicken Parmesan from Someone Left the Cake Out in the Rain tonight. Both recipes will definitely be made again in the future so I will add pictures at that time. LSH has been craving Italian food for a while and when he saw Chicken Parm on my list of possible recipes for the week, he said he definitely wanted me to try that one. I never got to it during the week, but it seemed like a great idea for a Sunday night. We were not disappointed. Like with most Italian food, we were stuffed by the time we finished. LSH rubbed his belly as he said this was better than any restaurant Chicken Parmesan he had ever had. I asked if this recipe was a keeper and he said "Definitely...all the days!" That's how I know a recipe is a keeper.

Next time I will definitely serve smaller plates. I'm also anxious to see how it tastes as leftovers since it seems like the type of food that would get richer the longer it sits. This recipes is pretty easy, but does take some time because you make the sauce from scratch and it is best simmered for a bit. If you love a good chicken parm and have a bit of time on your hands, I would definitely try this.

Time: 90ish minutes
Ingredients
3 Tbsp olive oil
1 Tbsp butter
1 small onion, chopped
4 cloves of garlic
3/4 cup red wine
1 28 oz can crushed tomatoes
1 14.5 oz can crushed tomatoes
2 tsp salt
2 Tbsp sugar
Black pepper and any other desired herbs (I went with oregano, basil, garlic powder, cayenne pepper, and crushed red pepper)

4-6 chicken breasts
3/4 cup flour
1/2 tsp salt
1/2 tsp pepper
3 eggs, beaten
2 cups Italian breadcrumbs
1/2 cup olive oil
2 Tbsp butter

1 cup parmesan cheese (not the kind in a can; we used the stuff in a bag and it was fine)
1 8oz block mozzarella cheese, sliced
1 lb fettuccine or other long noodle (we used angel hair)

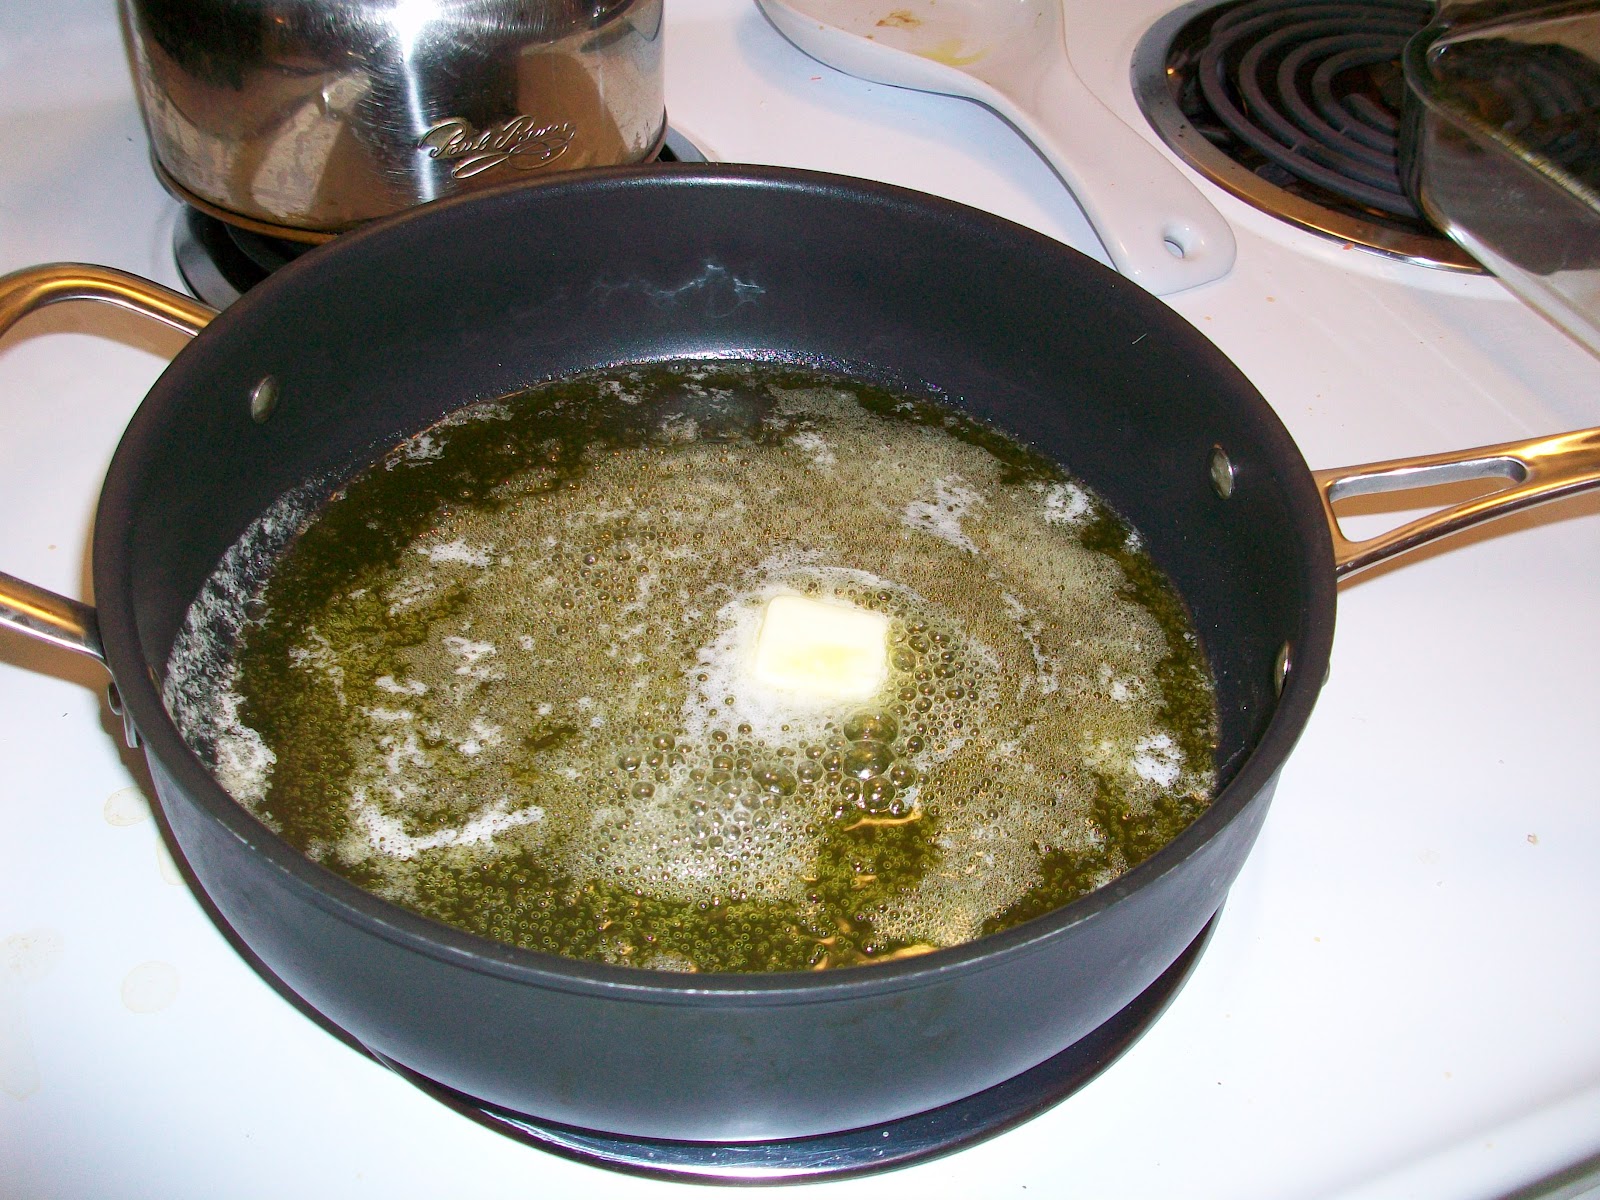
Heat your stove to medium-low heat. Pour your 3 Tbsp olive oil into a wide deep pan or a pot. You need something big enough for all the sauce. Add the Tbsp of butter and let it melt completely. You could probably leave out this extra butter and just use the olive oil, but why would you leave out butter? Once the oil is warm and the butter melted, add in the onion and the garlic. Saute until the mixture is fragrant and tender.

Add the wine (steal a sip or two from the bottle) and let the mixture bubble. Once the wine has reduced by about half, add in the cans of tomatoes with the salt, pepper, and sugar. Mix it up and you can choose to add your seasonings now or later. I added them now because I wanted the flavors to simmer all together. Let mixture simmer on medium-low heat for as long as you have. 30 minutes is a good minimum time. I covered the pot while it simmered because it was bubbling all over my stove.

While the sauce ingredients get to know each other, you can start on the chicken. Start by pounding the chicken breasts until they are about 1/4 of an inch thick. I recommend putting the chicken in a bag or putting it between wax paper or plastic wrap. It eliminates ickyness. Once the chicken is nice and flat, trim off the extra fat and whatnot.


Preheat the oven to 350.

Now comes the fun part of dredging. Mix together the flour, salt, and pepper and put it on a plate or in a shallow dish. Beat the eggs into a bowl. Finally, put the bread crumbs on another plate or shallow dish.


Pat the chicken breasts dry and toss them in the flour. Tap off any excess flour and dip into the egg. Let the egg drip off a bit and then completely coat the chicken breasts in the bread crumbs. Let the chicken breasts hang out on a plate while you get the next step ready.


Don't forget to stir your sauce! If you think it is done you can take it off the burn and let it chill out. Now back to the chicken....pour the 1/2 cup of olive oil into a pan and add the butter. Once it is all melted and hot, gently place the chicken in the pan.


There is no need to cook all the chicken at once, cook it in as many batches as needed. Let the chicken sit for about 3 minutes on one side and then flip and sit for another 3. There should be a beautiful golden brown crust on both sides of the chicken. It really is a beautiful sight.


Finally it is time to assemble it all! Pour about half of the sauce into the bottom of a 9x13 pan. Place the breaded chicken breasts on top of the sauce. Now top the chicken with the rest of the sauce.


Now it's time for the cheese. Sprinkle the parmesan cheese on top of each chicken breast and then top that with slices of mozzarella. Now you should see a pan of sauce with mounds topped with cheese. Yum!


Place the pan into the oven and let it cook for about 20 minutes or until the chicken is completely done and the cheese is melted. While the chicken bakes, prepare your pasta according to the directions.

Once the chicken is done serve it hot on top of the pasta with some extra sauce.

I recommend starting with eating half of a piece of chicken. LSH and I both ate a whole piece are are now uncomfortably full. It was delicious but pace yourself!

Also, if you halve the chicken in the recipe, I would halve the sauce too. I made a half recipe of chicken but made all of the sauce because we like a lot of sauce. With this recipe it was definitely too much. Enjoy the deliciousness!

Source: http://someoneleftthecakeoutintherain.wordpress.com/2009/11/20/crazy-good-chicken-parm/#more-107


Wednesday, January 4, 2012

Southwest Chicken and Rice: One-Pot Version

So the bad news is that I'm still waiting for my cord for my camera to come in so I can actually use it. The good news is that we I tried making another recipe and it was a success! This recipe came from Mel's Kitchen Cafe and is one that LSH said he would be interested in when I showed it to him. This blog is definitely worth checking out. I've tried several recipes and they have all been great! This chicken and rice dish was described by LSH as a Mexican stew. It is a very mushy chicken and rice dish but it is pretty good and flavorful and definitely lends itself to variations. It's also got some good nutritional value which is a bonus. This isn't typically my type of dish (I was planning to make Coconut Curry Soup for dinner, but LSH had a change of stomach...some other time this week though) but I actually really like this. As long as you are OK with a mushyish texture and you like typical southwest flavors, you will enjoy it. It's also great because it is a one-pot meal. Everything is cooked in one pot which cuts down on dishes and ups the flavor. A meal that comes together pretty quickly, requires little effort, has nutritional value, and tastes good? Sounds perfect to me!
Edit: Made this again tonight and now I have pictures to go with it!


Serves 4-6
Total Time: 45 minutes
Ingredients
3-4 boneless chicken breasts (2ish lbs)
Salt, black pepper, cayenne pepper
Vegetable oil
1 yellow onion chopped
4 cloves garlic, minced
1 tsp chile powder
1/2 tsp - 1 tsp cumin (LSH isn't a huge cumin fan so this is cut down for us)
1/2 tsp cayenne pepper (we like a little heat :D)
1 1/2 cups uncooked white rice
4 cups chicken broth
1 15 oz can black beans (drained and rinsed)
1 cup frozen corn (more or less)
1/2 green bell pepper, diced
4 oz cheese (we used monterey and colby jack cheeses)
Salsa
Fresh cilantro (optional: we didn't use it)

Start by patting the chicken dry and seasoning the breasts with a little salt and pepper and cayenne (if desired). In a large pot (choose the right size because you will be cooking this whole dish in it) and coat the bottom with olive oil. When oil is shimmering, put in the chicken breasts. Let them cook about 3-5 minutes on each side to get some color on them. You don't want them to fully cook in this step. When both sides are browned, remove the chicken and set it aside.


Throw the onion into the remaining oil and stir it around with a dash of salt. Cook it on medium heat until tender, stirring to mix in any browned bits from the pan. Stir in the garlic, cumin, chile powder, and cayenne pepper and cook until fragrant, about 30ish seconds.


Next mix in the rice. Once the edges of the rice are starting to look translucent (as much as you can tell through the delicious coating of spices) add in the 4 cups of chicken broth (or 4 cups of water and 4 bouillon cubes if you are like me). Stir in the broth and bring the pot to a simmer.


Once simmering, add in the chicken breasts. Cover the pot and reduce the heat to medium-low and let it simmer until the rice is tender and the chicken is cooked through. It takes about 20-25 minutes. After about 15-20 minutes, add in the bell pepper. You can time this addition by how crispy you want the pepper to stay. Give the mixture a stir everyone in a while. I time it with my stomach growls...


Once everything is cooked, remove the chicken and do what you want with it. The original recipe says to leave it whole and serve the rice on the side. I shredded the chicken and returned it to the pot which was delicious. It's up to you. With the chicken removed, stir in the black beans and the corn. Once they are warmed, stir in the cheese and keep stirring until it gets that gooey, mushy, melty appearance...that's how you know it's ready. At this point you can add your chicken back in and spoon it into a bowl, or you can scoop some rice on a plate next to the chicken as a side. Top it with whatever your heart desires. We went with salsa for that extra layer of flavor. I would definitely recommend that.


This is all there is to this recipe. It may seem involved, but it's not. Chop everything ahead of time and this meal comes together in no time.

Original post from Mels Kitchen Cafe at http://www.melskitchencafe.com/2011/08/one-pot-southwest-chicken-and-rice.html

Monday, January 2, 2012

The Best Pumpkin Nutella Bread

I went through a pumpkin phase in the fall where I loved baking with fresh pumpkin. In my quest for various recipes, I came across this one from Two Peas & Their Pod. This bread has the right amount of pumpkin taste swirled with the decadent flavor of Nutella. If you know me, you know I love Nutella. I love it in baked good, I love it on pancakes, crepes, etc, I love dipping things in it (graham crackers, animal crackers). If you don't know what Nutella is, it is a delicious combination of hazelnut and chocolate and can now be found in most grocery stores. I would recommend trying it if you like nuts and chocolate. It doesn't matter how you try it, just do it!

The first time I made this bread I took one loaf to school (I teach Spanish kindergarten at a public school) and LSH took a loaf to his study group. Both loaves disappeared quickly and received raving reviews. LSH even liked it and he is not a pumpkin fan! If you love pumpkin and Nutella, you must try this bread! Again, there are no pictures yet because my camera is still on the fritz. Hopefully that will be resolved soon.

Ingredients
1 3/4 cups all-purpose flour
1 tsp baking soda
1/2 tsp salt
1/2 Tbsp cinnamon
1 1/2 tsp nutmeg
1 1/2 cups sugar
1/2 cup vegetable oil (could try substituting apple sauce, I haven't done it yet but plan to.)
1/3 cup water
1 cup pumpkin (fresh or canned, just not pumpkin pie filling)
2 eggs
1 tsp vanilla
8 Tbsp Nutella (2 Tbsp for each mini loaf)

Preheat the oven to 350 F and grease 4 mini loaf pans.

In a medium bowl, combine flour, baking soda, salt, cinnamon, and nutmeg. In a large bowl, mix together the sugar, oil, water, pumpkin, eggs, and vanilla. Whisk ingredients until smooth. When smooth, slowly stir in the flour combination and mix until all ingredients are combined.

 Evenly divide the batter among the 4 greased mini pans. Heat the 8 Tbsp Nutella just enough so that it is thinned out, it shouldn't take too long. Once it is thinned, drop 2 Tbsp of the delicious spread into each mini pan and make beautiful swirls in the batter with a knife. You can do this step without heating the Nutella, but I found it difficult due to thickness and the Nutella stayed in huge globs in the bread. Not that I'm complaining, but I thought the bread might be improved if there was a more even distribution of deliciousness. Finally, put the mini pans on a baking sheet and put them in the oven. Bake the breads for 40-45 minutes or until a toothpick comes out clean.

Take them out and put them on a cooling rack. I am horribly impatient when it comes to freshly baked goods, but you must let these cool before taking them out of the pans or else they will be a horrible mess. I did not wait until they were cool the first time I made them and I had a mess on my hands. It was a delicious mess, but I was hoping for something a little prettier. So let them rest for about 15 minutes and then gently remove them from the pans. The creator of this recipe recommends letting them cool completely before slicing, but if you are like me, you are going to slice it before it is cool. Warm sweet bread is too tempting! The bread is also amazing once cooled. Enjoy!

Original post: http://www.twopeasandtheirpod.com/pumpkin-nutella-bread/

Sunday, January 1, 2012

Crispy French Fries for the Garlic Lover

Law Student Husband (LSH) and I love french fries. Our standby favorites are probably Arby's curly fries. One day over the summer we decided it was time for us to make our own fries, being grown-ups and all. We searched the web and found a few recipes. LSH tried one that attempted to duplicate Arby's but they were awful and fell apart! We tried another basic one and they were bland and mushy. Finally, I found this recipes on foodiewife-kitchen's blog A Feast for the Eyes. These fries were everything LSH and I were looking for; they were crispy, garlicky, and just a little bit spicy. Ever since the first time we made them, they have become a regular side dish. Please try them and enjoy them as much as we do! I plan to add pictures to this the next time I make these addicting things.
Edit: Pictures are added!

We'll start with the ingredients:
3 or so potatoes (we use russet) cut into fries or wedges (LSH always does this step because I fail at cutting even-sized pieces)
8 cloves of garlic, minced (We buy the pre-minced jars because we're lazy and it's still potent)
6 Tbsp olive oil
3 Tbsp corn starch
1 1/2 tsp sea salt
3/4 tsp ground black pepper
1/2 tsp garlic powder
1/4 - 1/2 tsp cayenne pepper (depending on how much spice you want; we like it spicy!)
Preheat the oven to 475° F

LSH cuts the fries so pretty :)

Start with putting the olive oil and the garlic in a large bowl. Microwave the bowl for about a minute. This is to infuse the oil with garlicky goodness. Once the oil is fragrant pour 5 Tbsp of the oil (leaving the garlic in the bowl) onto a large baking sheet.


Add the potatoes to the large bowl with the remaining oil and garlic.


Cover the bowl with plastic wrap and stick it in the microwave for about 5-7 minutes depending on how thick your wedges are. This step is key to the amazing texture of these fries.

While the potatoes are softening up in the garlic awesomeness, mix together the corn starch, salt, pepper, garlic powder, and cayenne in a small bowl.

Once the potatoes are done, let them cool slightly and then carefully toss them with the cornstarch mixture. Your goal is to coat each wedge in the powder. This is what gives them their satisfying crunch. When you see all the potatoes coated, place them on the oiled baking sheet. Place them so they are not touching to ensure crispyness. Once they are lined up so prettily, stick them in the oven on a middle rack. After about 15 minutes, take out the sizzling wedges and flip them. If you can't stand the temptation, snitch one now! They may not be super crispy, but they are still delicious. Stick them back into the oven for another 15 minutes or until they have reached the desired crispiness. 


Slide those suckers off the sheet onto a plate and hide them from others because you will not want to share! These are wonderful with no sauce, but if you must, ketchup is an OK option.

Check out http://foodiewife-kitchen.blogspot.com/2009/04/garlic-oven-fries.html for the original posting.

Welcome!

Cooking and baking are two of my favorite activities. I love perusing recipes online and altering them to make them my own. I also enjoy sharing my finds with others. My husband suggested starting a blog to make sharing my findings even easier. This blog will have a variety of recipes ranging from Italian to Thai to Mexican and from cookies to bars to brownies. Feedback is always welcome and I would love to hear alterations you have made to the recipes and whether you enjoyed the recipe or not. Please enjoy and eat well!